
Getting Started with GitHub: A Beginner’s Guide
GitHub is a platform where you can store and share your code online, keeping track of all changes. It helps developers collaborate on projects, fix bugs, and build cool stuff together.
GitHub is more than just a platform for storing code—it’s a hub for collaboration, learning, and sharing in the developer community. Whether you’re a seasoned coder or a beginner taking your first steps, GitHub offers tools and features that can elevate your projects. Let’s dive into how to get started and make the most of this powerful platform.
What is GitHub?
GitHub is a web-based platform that uses Git, a version control system, to manage code repositories. It enables developers to track changes, collaborate with others, and maintain a history of their project.
Key Features of GitHub
- Version Control: Keep track of every change made to your project, enabling easy rollback if needed.
- Collaboration: Work with teams using branches, pull requests, and issue tracking.
- Open Source Community: Contribute to public projects and learn from others’ code.
- CI/CD Integration: Automate testing and deployment pipelines directly from your repositories.
- GitHub Pages: Host personal websites or project documentation for free.
Why Should You Learn GitHub?
- Collaborative Development: Share projects and work with others seamlessly.
- Industry Standard: Most organizations use GitHub for code management.
- Portfolio Building: Showcase your projects and contributions to potential employers.
- Learning Opportunities: Explore repositories, follow trends, and contribute to open-source projects.
Step-by-Step Guide for Beginners
1. Set Up Git and GitHub
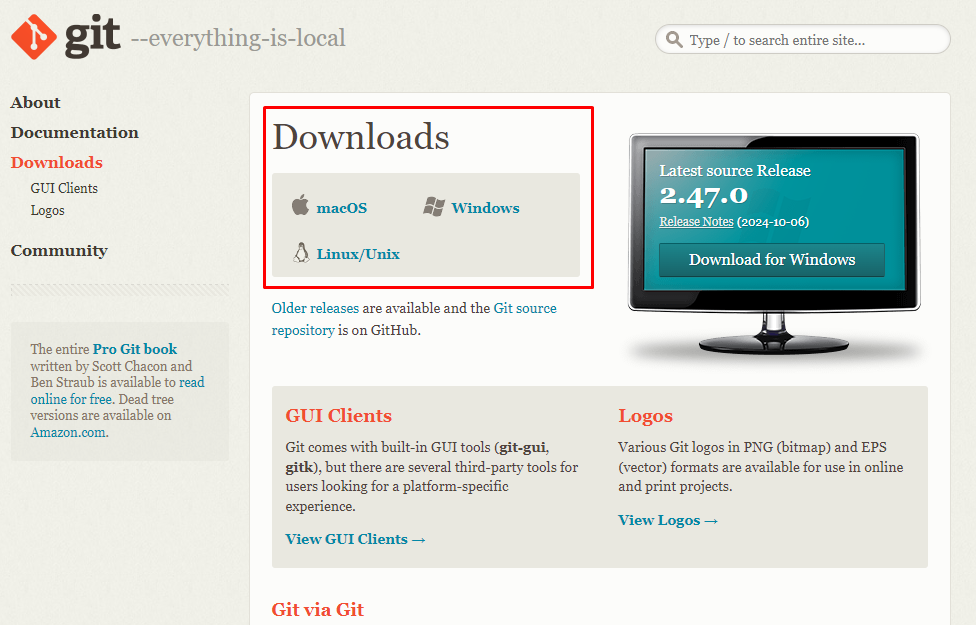
Install Git:
Download Git from git-scm.com/downloads and follow the installation instructions.
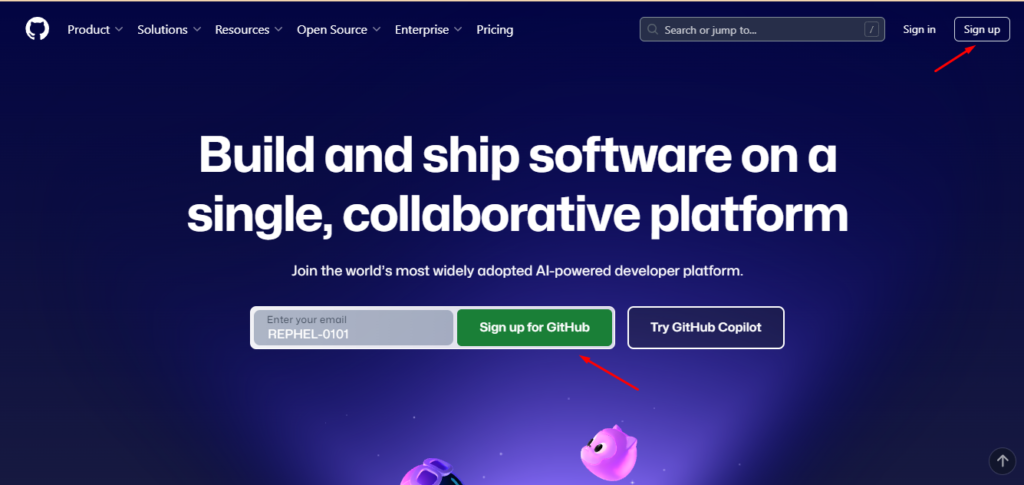
Create a GitHub Account:
Sign up at GitHub to access the platform.
2. Publish your First Webpage
2.1 Non Code Method
- Sign in to GitHub:
- Log in to your GitHub account.
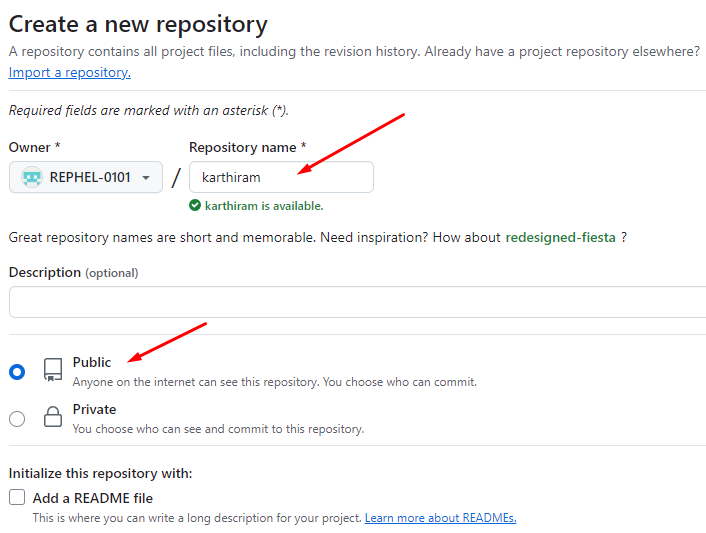
- Create a Repository:
- Click the green “New” button on the homepage.
- Name the repository (e.g.,
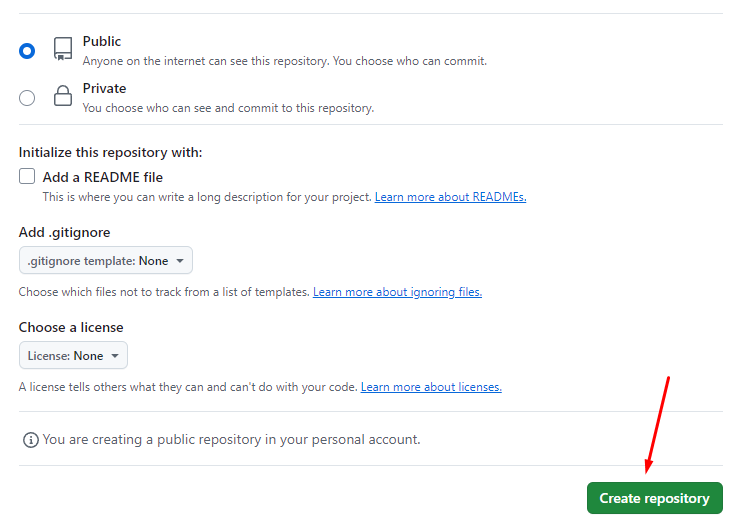
rephel-website) and make it Public. - Check the option “Add a README file” (optional)
- click “Create Repository”.
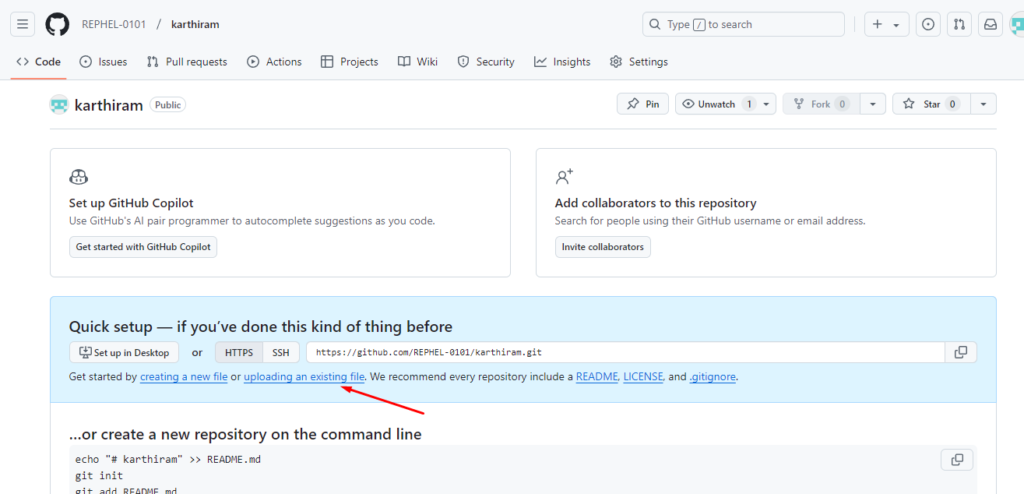
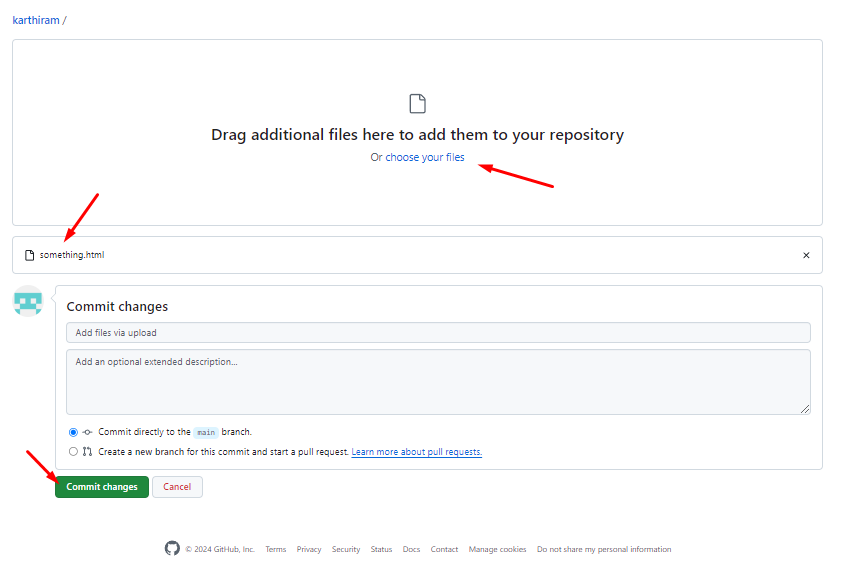
- Upload Your HTML File:
- In the repository, click the “Add file” dropdown and select “Upload files”.
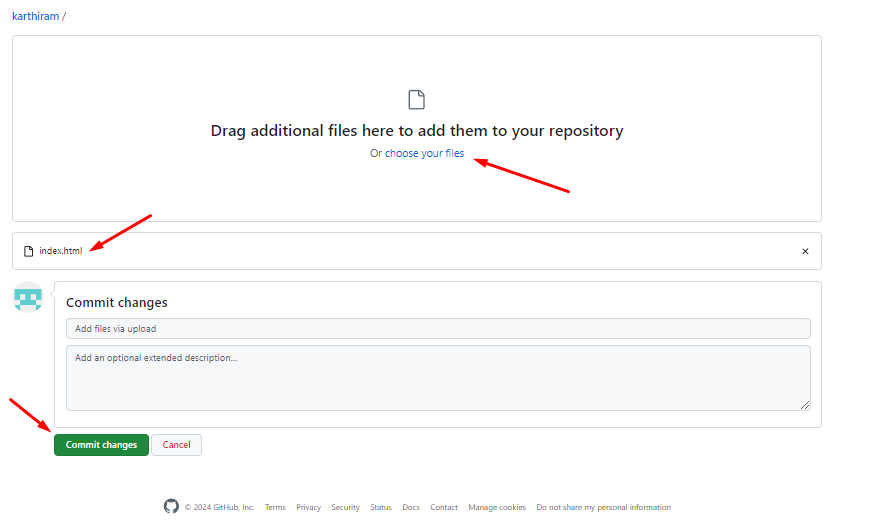
- Drag and drop your HTML file (and other assets like CSS, JS, or images if needed) or use the “Choose your files” button.
- Scroll down and click “Commit changes”.
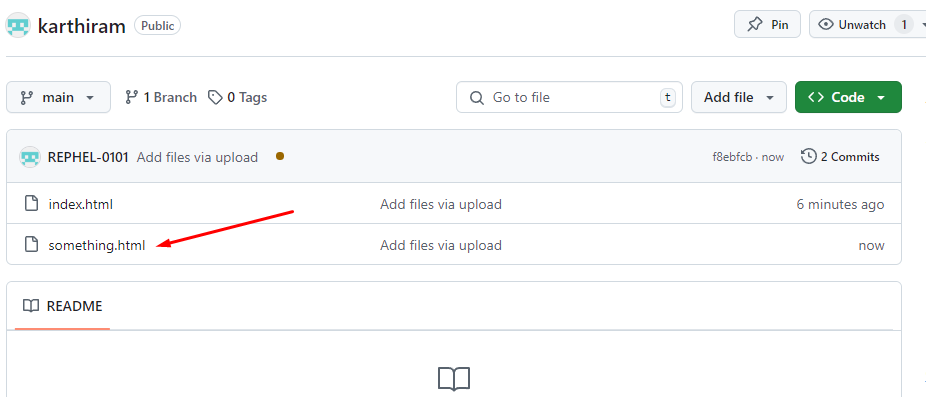
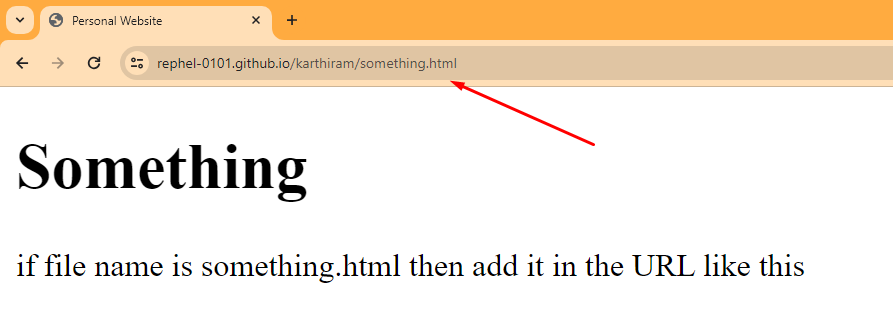
- Note: File name should be index.html. if it is something else, then need to add it at the last part of your URL
- Refer the below screenshots if you want to create a new html file by yourself
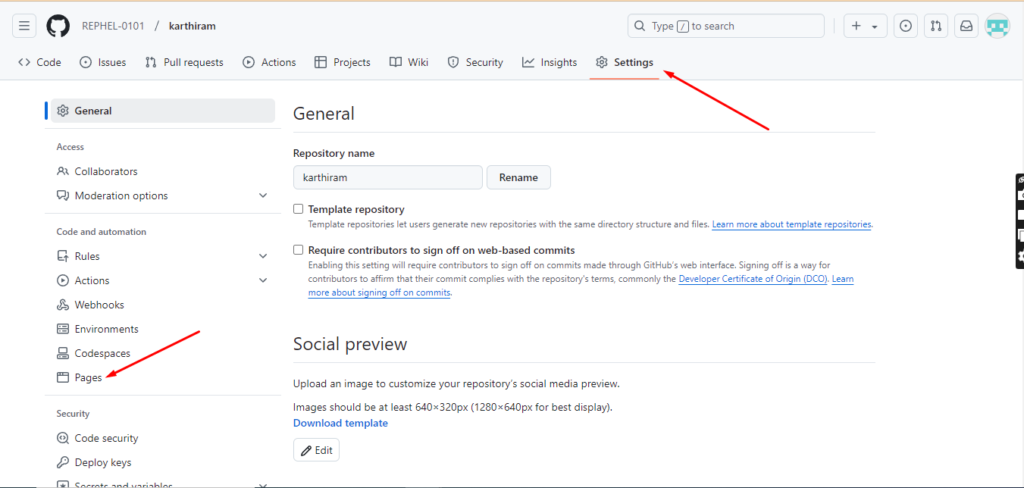
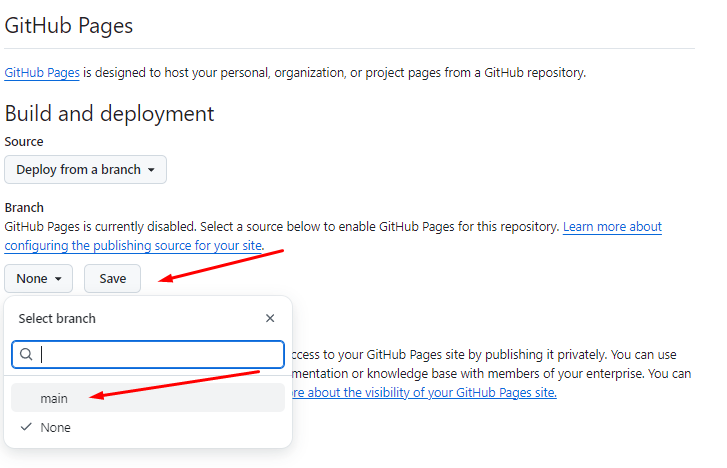
- Enable GitHub Pages:
- Go to the repository’s Settings (gear icon).
- Scroll down to the “Pages” section. (LHS)
- Under “Source”, select “Deploy from a branch” or use the default
mainbranch and/rootfolder. - Click “Save”.
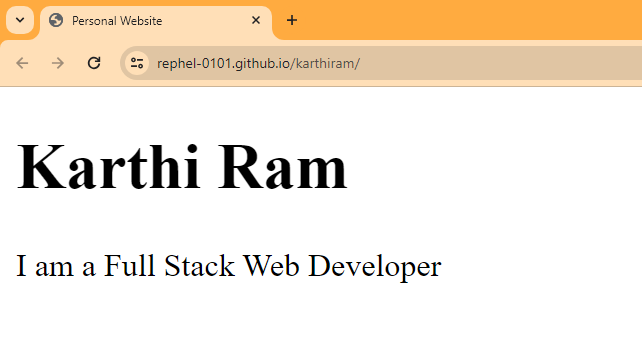
- Access Your Published Page:
- GitHub will provide a URL (e.g.,
https://yourusername.github.io/my-website). - Visit the link to see your published HTML page.
- GitHub will provide a URL (e.g.,


Key Notes:
- Ensure your main HTML file is named
index.htmlfor it to load automatically. - For multiple files (like CSS or images), maintain the same folder structure during upload.
2.2 Coded Method
Initial Git Configuration
# Set your name
git config --global user.name "Your Name"

# Set your email
git config --global user.email "youremail@example.com"
Verify Git Configuration
# Verify your user name
git config --global user.name

# Verify your email
git config --global user.email
Create a New Repository on the Command Line
#1. Initializes a new Git repository in the current directory.
git init

#2. Shows the current state of the repository, including untracked and staged changes.
git status

#3. Stages all changes (new, modified, deleted files) in the current (.) directory for the next commit.
git add .

#4. Commits the staged changes with a message "first commit".
git commit -m "first commit"

#5. Verifies the repository status after the commit.
git status

#6. Renames the current branch to `main`.
git branch -M main

#The -M flag in git branch -M main stands for "move" or "force rename".

#7. Lists all the branches in the repository.
git branch

#8. Links the local repository to a remote repository on GitHub.
git remote add origin https://github.com/REPHEL-0101/karthiram.git

#9. Pushes the `main` branch to the remote repository and sets `origin/main` as the default upstream branch.
git push -u origin main
Initialize Your First Repository
- Create a new repository from your GitHub dashboard.
- Clone the repository to your local machine:
git clone <repository-url> - Add files to the repository and track changes:
git add . git commit -m "Initial commit" - Push your changes:
git push origin main
3. Collaborate with Others
- Fork Repositories: Create a personal copy of someone else’s project.
- Issues: Track bugs, feature requests, or project discussions.
- Pull Requests: Propose changes to a repository.
A Pull Request (PR) is a way to propose changes in a repository on GitHub. It’s commonly used in collaborative projects to request that others review and merge your changes into the main codebase.
How Pull Requests Work:
- Create a Branch:
- Make changes to your project in a separate branch to keep the main branch clean.
- Push Your Changes:
- Push your branch to the repository on GitHub.
- Open a Pull Request:
- Go to your repository on GitHub.
- Click “Pull Requests” > “New Pull Request”.
- Select your branch and the branch you want to merge into (usually
main). - Add a title and description explaining your changes.
- Review Process:
- Team members can review your pull request, leave comments, or request changes.
- Merge the Pull Request:
- Once approved, the changes can be merged into the main branch.
Why Use Pull Requests?
- Ensures code quality through reviews.
- Tracks and documents changes in the project.
- Encourages collaboration and communication.
Pull Requests are essential in team workflows to maintain project consistency and quality!
4. Explore Advanced Features
- Learn about branching and merging to work on features independently.
- Set up GitHub Actions for CI/CD pipelines.
- Use GitHub Projects to manage tasks and milestones.
Tips for Mastering GitHub
- Stay Consistent with Commits: Write meaningful commit messages to make your changes understandable.
- Follow Best Practices: Use
.gitignorefiles to avoid pushing unnecessary files. - Explore Open Source: Start contributing to small projects to build confidence.
Conclusion
GitHub empowers developers to build, collaborate, and grow together. By mastering its features, you not only improve your project management skills but also open doors to exciting career opportunities. Start small, explore frequently, and soon you’ll become a GitHub pro!
Are you ready to push your first commit? 🚀
What are your favorite GitHub tips? Share them in the comments below!